Showing posts with label Nails. Show all posts

Friday, March 6, 2015

Playing with Textures: Gold and Green Nails


My love for textured nail polish started when I was doing jewelry craft. You tend to damage your nails a lot when working with the tools and chemicals, and I noticed that they endured better when I used these types of nail polish. Even though I'm on hiatus from the jewelry making, I still enjoy playing with textures on my nails.
___________________

Mi amor por esmalte de uñas con textura empezo cuando hacia joyas de metal. Las uñas siempre se deterioran al trabajar con herramientas y quimicos, pero despues de usar este tipo de esmaltes note que las protegia mas. Y ahora aunque me tome un descanso de trabajar con mis manos (problemas de ligamento-dedo), sigo usando texturas en mis uñas. Me gusta :) 

  1. First I apply a base coat (which I forgot to take a picture of). Primero puse un esmalte de base protector (me olvide de tomar foto).
  2. Then I apply the color coat, (in this case the green), usually about 3 coats. Aplique el color verde como tres capas.
  3. And finally I apply the matte texture (also on the gold). Y al final aplique el esmalte mate. Me encanta ya que torna cualquier color en mate :)

Usually these colors would be very shimmery and reflective but the matte only lets a little through, which gives it an interesting effect. Estos timpos de esmaltes son bien brillosos, pero el mate hace que el brillo solo se vean un poquito lo cual lo hace ver mas interesante y atractivo.

(Verde) Green: Maybelline New York Color Show Holographic "Mystic Green 25".
(Dorado) Gold: Essie "Rock at the Top".
(Mate) Matte: Nicole by OPI "Matte Top Coat".

See you on Facebook & Instagram
Kisses!
______________

Nos vemos en Facebook & Instagram
Besos!


Here are some other times I had texture nails (sorry the last pics are not that great)
Aqui hay algunas fotitos de cuando use esmalte con textura (lo siento que las ultimas fotos no estan tan bien)


Thursday, November 14, 2013

Toothpick, Cotton & Nail Polish


Hi dolls! 
I have found that the most effective way to remove nail polish around the nails is to twist cotton around the point of a toothpick and then dip it in nail polish remover. The finer tip works better then  a q-tip or cotton alone. Hope that helps 
__________________

Hola bellas!
Para mi, la manera mas efectiva de limpiar los residuos de esmalte que queda en los dedos es usar un palito de dientes con algodon. Al ser la punta mas fina, se puede llegar a los rincones de la uña y la piel y limpiar mejor que una pieza de algodon o un hisopo. Espero esto  ayude 

Tuesday, July 30, 2013

Red and White Nails:: Peruvian Flag Inspired

"The army is the true nobility of our country"
~ Napoleon Bonaparte
_________________

"El ejercito es la nobleza verdadera de nuestro pais"
~ Napoleon Bonaparte


Hola a todos, Hoy quiero compartir uñas color blanco y rojo inspirada en la bandera peruana. El Domingo que paso fue el dia de la independencia de Peru, y como buena peruana, quise mostrar mi amor por mi patria vistiendo estos dos amados colores. Espero que les guste esta idea.

English
Hi everyone, Today I wanted to share a white and red nail polish idea which was inspired by the peruvian flag. Last Sunday was Peru's Independence day and as a good peruvian, I wanted to show my love for my country by wearing these hues.
Hope you like this.


Te amo Peru !
Dios te bendiga.

I love you Peru !
May God bless you.

Muchas gracias por tu visita y apoyo.
Nos vemos en facebook.
_______________

Thank you so much for reading.
See you on facebook.


Thursday, July 4, 2013

DIY 4th of July Manicure

Happy 4th of July everyone !!!! How about manicure inspired on the beautiful American flag!

You'll need:
  • Red, White, Blue and Trasparent nail polish. ( I had mine from last year)
  • Toothpick.
  • Tape.
  • Nail Polish Remover.

Español/Spanish:
 Feliz 4 de Julio a todos!!! Que honda si hoy hacemos manicure inspirada en la hermosa bandera de Los Estados Unidos!!
Necesitaras:
  • Esmalte rojo, blanco, azul y transparente. (los mios son del año pasado)
  • Palitos de dientes.
  • Cinta.
  • Removedor de esmalte.


Step 1: Apply red on all your nails except on the ring finger because it will be blue.

Paso 1: Pinta tus uñas de color rojo excepto la uña del dedo anular.


Step 2: After they dry apply long strips of tape along your nails just like in the pictures. Do not apply on the blue nail.

Paso 2: Aplica piezas de cinta adhesiva como se muestra en las fotos. Deja la uña azul sin cinta.


Step 3: After you apply the white nail polish on the gaps made by the tape, start making star shapes using the toothpick (just like in the pictures).

Paso 3: Mientras el esmalte blanco se esta secando, aplica las estrellitas usando el palito de dientes (como se muestra en la foto).


Step 4: After you remove the tape, don't forget to apply the transparent nail polish and use the nail polish remover to clean any mess.
And Voila !!!

Paso 4: Despues de remover los pedacitos de cinta, no te olvides de aplicar el esmalte transparente y usar el quita esmalte para limpiar cualquier exceso en tus dedos.
Y listo !!!


Happy 4th of July !!!!
God bless America !!

xo!!!
Elsey


Friday, July 6, 2012

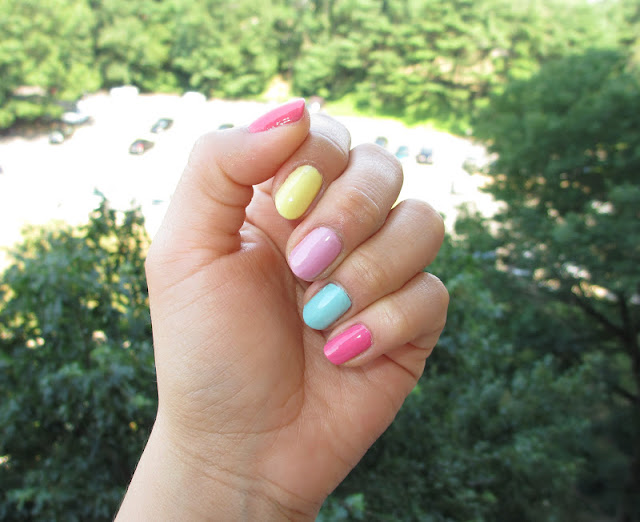
Cotton Candy Nails Weekend

Hi beautiful people! Sharing with love for you these 3 styles of cotton candy nails :D ! I hope you like them. Have a beautiful weekend everyone ^^ !!!

Spanish/Español
Hola lindas! Aqui compartiendo con cariño para ustedes, 3 estilos de uñas colores caramelo :D ! Espero les guste. Que tengan un fin de semana lindo ^^ !!!


I covered half of each nail with tape.

Cubri la mitad de cada uña con cinta adhesiva.


I applied the dots using a toothpick.

Aplique cada gotita usando un palito de dientes


 At the end, I decided to add dots on each nail :) and this is how it looks.

Al final, decidi agregar lunares en todas las uñas jejeje..y asi es como se ven ahora :)


Thank you very much for visiting !
hugs !!!
Elsey

Sunday, December 25, 2011

Holidays Nail Polish Idea


Brillemos!!! siiii!!! Hagamos manicura "Francesita" pero esta vez con brillos (me encanta usarlos especialmente durante esta temporada de las Fiestas). Ten cuidado de aplicar demasiado porque terminaras con mucho producto como me quedo en el dedo del anillo. Primero aplica el color oscuro y una vez que este seco, aplica el esmalte brilloso. El esmalte transparente es el ultimo paso y se aplica una vez que todo este seco. 
______________________

Let's sparkle!!! yay!!! Something like French Manicure Style... just be careful of applying too much and causing bulges of product (like on my ring finger). First, apply the dark color and once it is dried apply the sparkle nail polish. The top coat is the final step. I used Sally Hansen brand on Vivid color (old) and "200 Strobe Light". I hope you enjoy this idea.


See you on Facebook & Instagram here here
______________

Nos vemos en Facebook y en Instagram aqui y aqui